


Why we fit it
A solid wall has no cavity to fill, so the insulation has to go on the inside or the outside. Inside is where most occupied homes end up, because it can be done one room at a time with the family still living there. The question is how you build it out. We fit the SWIP Solid Wall Internal Wall Insulation System, and this page sets out why, from the point of view of the people holding the drivers.
SWIP Ltd is a Birmingham-based system designer and material supplier to the retrofit sector. Its products are used on ECO, Local Authority Delivery and Home Upgrade Grant work, as well as private jobs. The IWI system is assessed by the British Board of Agrément under BBA Certificate 18/5506. That certificate, together with SWIP's IWI Design Guide, is the document we work to.
Uninsulated 9 inch brick
U-value 2.1 W/m²K
All the heat escapes
With 95 mm SWIP
U-value 0.29 W/m²K
86% less heat lost
Not dot and dab: what makes it different
The quickest way to insulate a solid wall from the inside is insulated plasterboard stuck on with adhesive dabs. It is quick, but it leaves an air gap behind the board. You are relying on the adhesive and on the old plaster behind it, and there is nothing to screw a fixing into.
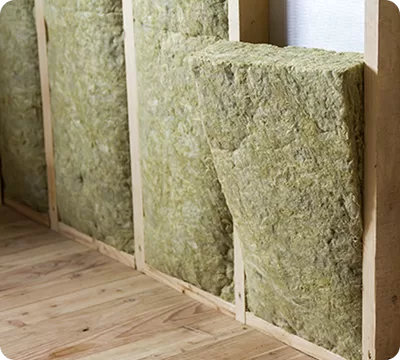
SWIP works differently. It is a mechanically fixed stud and batt lining. The studs are made of insulation and screwed through to the masonry. Mineral wool batts are friction fitted between them, and the room side is closed with a sealed vapour control layer and plasterboard. A traditional timber stud is a line of poor insulation every 600 mm. SWIP's stud is extruded polystyrene with an OSB face, so the frame insulates too. SWIP says this cuts thermal bridging through the studs and gives a thinner build-up than a conventional stud wall for the same result.
Timber studs
A cold line every 600 mm
SWIP insulated studs
The frame insulates too
The build-up, layer by layer
Working from the brickwork into the room, this is what goes on the wall:
Existing masonry
It has to be rain resistant and free from penetrating or rising damp before anything goes on it. If it is not, that gets fixed first.
SWIP Stud
50 mm or 80 mm of extruded polystyrene bonded to 15 mm OSB, which makes a 65 mm or 95 mm stud, 50 mm wide and 2400 mm long. Screwed to the wall with stainless countersunk screws and plugs, at least 40 mm into the masonry, at no more than 600 mm centres.
SWIP EcoBatt
Glass mineral wool slab, 555 × 1200 mm, 65 mm or 95 mm thick, cut 5 mm oversize so it fills the bay tightly. Water repellent and Class A1 for reaction to fire.
Vapour control layer
Stapled to the studs with joints lapped and taped and the edges sealed. SWIP's standard green membrane, or SWIP Intello on high exposure properties. SWIP's System Selector chooses between them by postcode.
12.5 mm plasterboard, then skim
Screwed into the OSB face at 300 mm centres (200 mm at corners), with a 3 to 5 mm gap at the floor sealed with flexible sealant. Perimeter joints sealed with SWIP sealant to stop air moving behind the lining.
Source: BBA Certificate 18/5506 (Issue 2, February 2025) and the SWIP IWI Design Guide (February 2026).
What it does to a solid wall: the numbers
The BBA certificate gives example U-values for two walls. The first is a 9 inch solid brick wall that starts at 2.1 W/m²K. The second is an older cavity wall that starts at 1.44 W/m²K. Both use studs at 600 mm centres. Lower is better. Current Building Regulations ask for 0.30 W/m²K when an existing wall is upgraded, where that is practical.
| Build-up | U-value (W/m²K) |
|---|---|
| 9 inch solid brick, uninsulated | 2.1 |
| 9 inch solid brick + 65 mm SWIP | 0.40 |
| 9 inch solid brick + 95 mm SWIP | 0.29 |
| Cavity wall, uninsulated | 1.44 |
| Cavity wall + 65 mm SWIP | 0.37 |
| Cavity wall + 95 mm SWIP | 0.28 |
Source: BBA Certificate 18/5506 Issue 2, Table 6. SWIP's Design Guide quotes 0.43 and 0.30 for its 65 mm and 95 mm systems. Each project is calculated to BS EN ISO 6946 and BRE BR 443, because real walls vary.
For most of the homes we survey, 95 mm is the sweet spot. It takes a 9 inch brick wall from 2.1 to 0.29, so about 86% less heat goes out through that wall. It also keeps rooms usable. Where the full depth will not fit, for example in a tight reveal, around fixed services or on a narrow stair, SWIP's 27 mm or 12.5 mm insulated reveal boards still insulate that area. Leaving it bare invites condensation. Every millimetre of the system comes off the room, the window reveals and the kitchen run. That is a conversation we have at survey, not on the day.
Moisture: the part that decides whether it works
Internal wall insulation makes the brickwork colder, because the heat from the room no longer reaches it. A colder wall is fine if it stays dry. It is a problem if warm, damp air from the room can reach it, or if rain is already getting in. Almost every IWI failure we are called to look at comes back to moisture, not the insulation.
Before we start
- We find out where any damp is coming from and fix it: gutters, pointing, render, ground levels. The BBA certificate requires the wall to be rain resistant and free of rising damp.
- If a damp-proofing treatment has been applied, we give it the time the certificate requires before the lining goes on.
- We treat any mould, and we check the wall is flat. Anything out by more than 10 mm over 1 m gets made good.
The vapour control layer
The layer that does the real work is a membrane you never see once the room is finished. It stops warm, wet room air reaching the cold masonry behind the insulation. It only works if it is continuous, so we lap and tape every joint, and we seal around every socket and pipe that passes through it. SWIP offers two membranes. One is its standard closed membrane. The other is SWIP Intello, an intelligent membrane that changes its permeability with the seasons, so it holds moisture back in winter and lets the wall dry out in summer. SWIP's System Selector picks between them by the property's postcode and exposure.
The certificate requires walls to be designed to BS 5250:2021. Where those calculations show a risk of persistent condensation, a site-specific dynamic analysis to BS EN 15026 is required before any work starts.
Ventilation
A drier, more airtight room still needs to let moisture out. The certificate calls for adequate permanent ventilation where the system goes on rooms with high humidity. On funded work, ventilation is assessed under PAS 2035. On private jobs we look at extract in kitchens and bathrooms as part of the survey, because insulation without ventilation is how condensation starts.
The junctions: where heat and moisture find a way round
On the flat of the wall, a good system is hard to get wrong. The edges are where installs go wrong.
Window and door reveals
An uninsulated reveal is a cold strip around every window, and that is where black mould turns up. Under the SWIP system, reveals are lined with thermal laminate board. It goes on with a full bed of adhesive plus mechanical fixings, and finishes flush with the stud face. The stud next to the jamb is set out to suit.
Skirtings and corners
Wherever possible, skirtings come off so the insulation runs unbroken to the floor. The plasterboard stops 3 to 5 mm short of the floor, and that gap and every perimeter joint are sealed. Batts fill the space in every direction, corners included. A hollow corner is a small gap, but it makes a cold line from floor to ceiling.
Floors, ceilings and party walls
Where a heavy internal wall or floor meets the insulated wall, the insulation is broken and heat can travel along the masonry. The certificate asks for thermal bridging here to be minimised, following BR 262. On site that means taking the insulation as far into the junction as the structure allows, and talking it through with the retrofit coordinator on funded work.
Fire stopping
The batts are Class A1. The polystyrene in the studs is Class F, so it has to stay fully enclosed behind the board. Any cavities the system forms need cavity barriers and fire stopping as the Building Regulations require. In England, the certificate also limits the system to residential buildings with no storey at 11 m or above.
Services: sockets, radiators, cables and flues
- Electrics. Cables buried in insulation run hotter. The certificate notes that fully surrounded wiring can need de-rating to as little as half its free-air capacity, so an electrician checks the circuits. Sockets and switches come forward onto the new wall face, and the vapour control layer is sealed around each back box.
- Radiators. A radiator never hangs on plasterboard alone. SWIP's guide allows four ways to fix one: through the board into the studs, on timber battens over the board, on battens fixed between the studs to the masonry, or on SWIP drywall fixing channels. Battens take up to 75 kg per metre run, and the channels take up to 50 kg for small radiators.
- Cupboards and heavy items. Mirrors, shelves and curtain poles go on standard plasterboard fixings. Kitchen cupboards need heavy duty cavity anchors, battens set at agreed positions, or stand-off fixings back to the masonry. The BBA certificate covers lightweight items only, so we mark these positions at survey.
- Flues and appliances. Anything near a flue follows Approved Document J.
How a room goes, day by day
- Survey and design. We check for damp, measure the critical dimensions, choose the thickness and membrane by exposure, and calculate the U-value. On funded work this goes through PAS 2035 assessment and coordination.
- Strip and prepare. We protect the floors and furniture, take off the radiators, skirtings, sills and trims, and make good the wall so it is flat and sound.
- Frame. Studs go in at the head and foot of the wall, then vertically at 600 mm centres and around openings, set out so the board joints land on studs.
- Insulate. Batts are cut 5 mm oversize and friction fitted. Reveals are lined with laminate.
- Seal. We fit the vapour control layer, lapped and taped, and seal every service that passes through it.
- Board and finish. We board, seal the perimeter, skim, and refit the skirtings, architraves, sills, radiators and sockets.
- Hand over. You get photographs of every stage before it was covered up, the certificates, and the guarantee paperwork.
We photograph each layer before the next one covers it. Once a room is plastered, the photographs are the only proof of what is behind the board. Housing providers and retrofit coordinators expect them, and homeowners should too.
Guarantee and inspections
SWIP offers a 25 year guarantee on its product. Its warranty applications are made through SWIP once the work is complete. SWIP also runs C2 inspections of installs, which link to the warranty. The SWIP videos below explain what a warranty covers and how an inspection works. We confirm the guarantee terms for your job in writing with your quote.